

Note:
- This article assumes that you do not know anything about live streaming, and is therefore a simplified setup. If you'd like to setup your livestream with professional cameras please follow our Advanced Livestream Setup Guide
- This article explains how to stream from a computer. If you are looking for how to do mobile streaming, please visit our article on How to Setup Livestream from Mobile (iOS/Android).
Requirements:
- PC (Windows 7 or later) or Mac (OS X Mavericks or later)
- Approx. Time (5-20 minutes)
Introduction
Whether you are a video professional or amateur, anyone can stream their service live from a desktop computer! This article will show you how to setup OBS, connect it to your Omnia Livestream account, start streaming, and view your Livestream in your Omnia Channel.
1. Download OBS Encoder - This software allows you to send video to Omnia
You can download OBS here: https://obsproject.com/
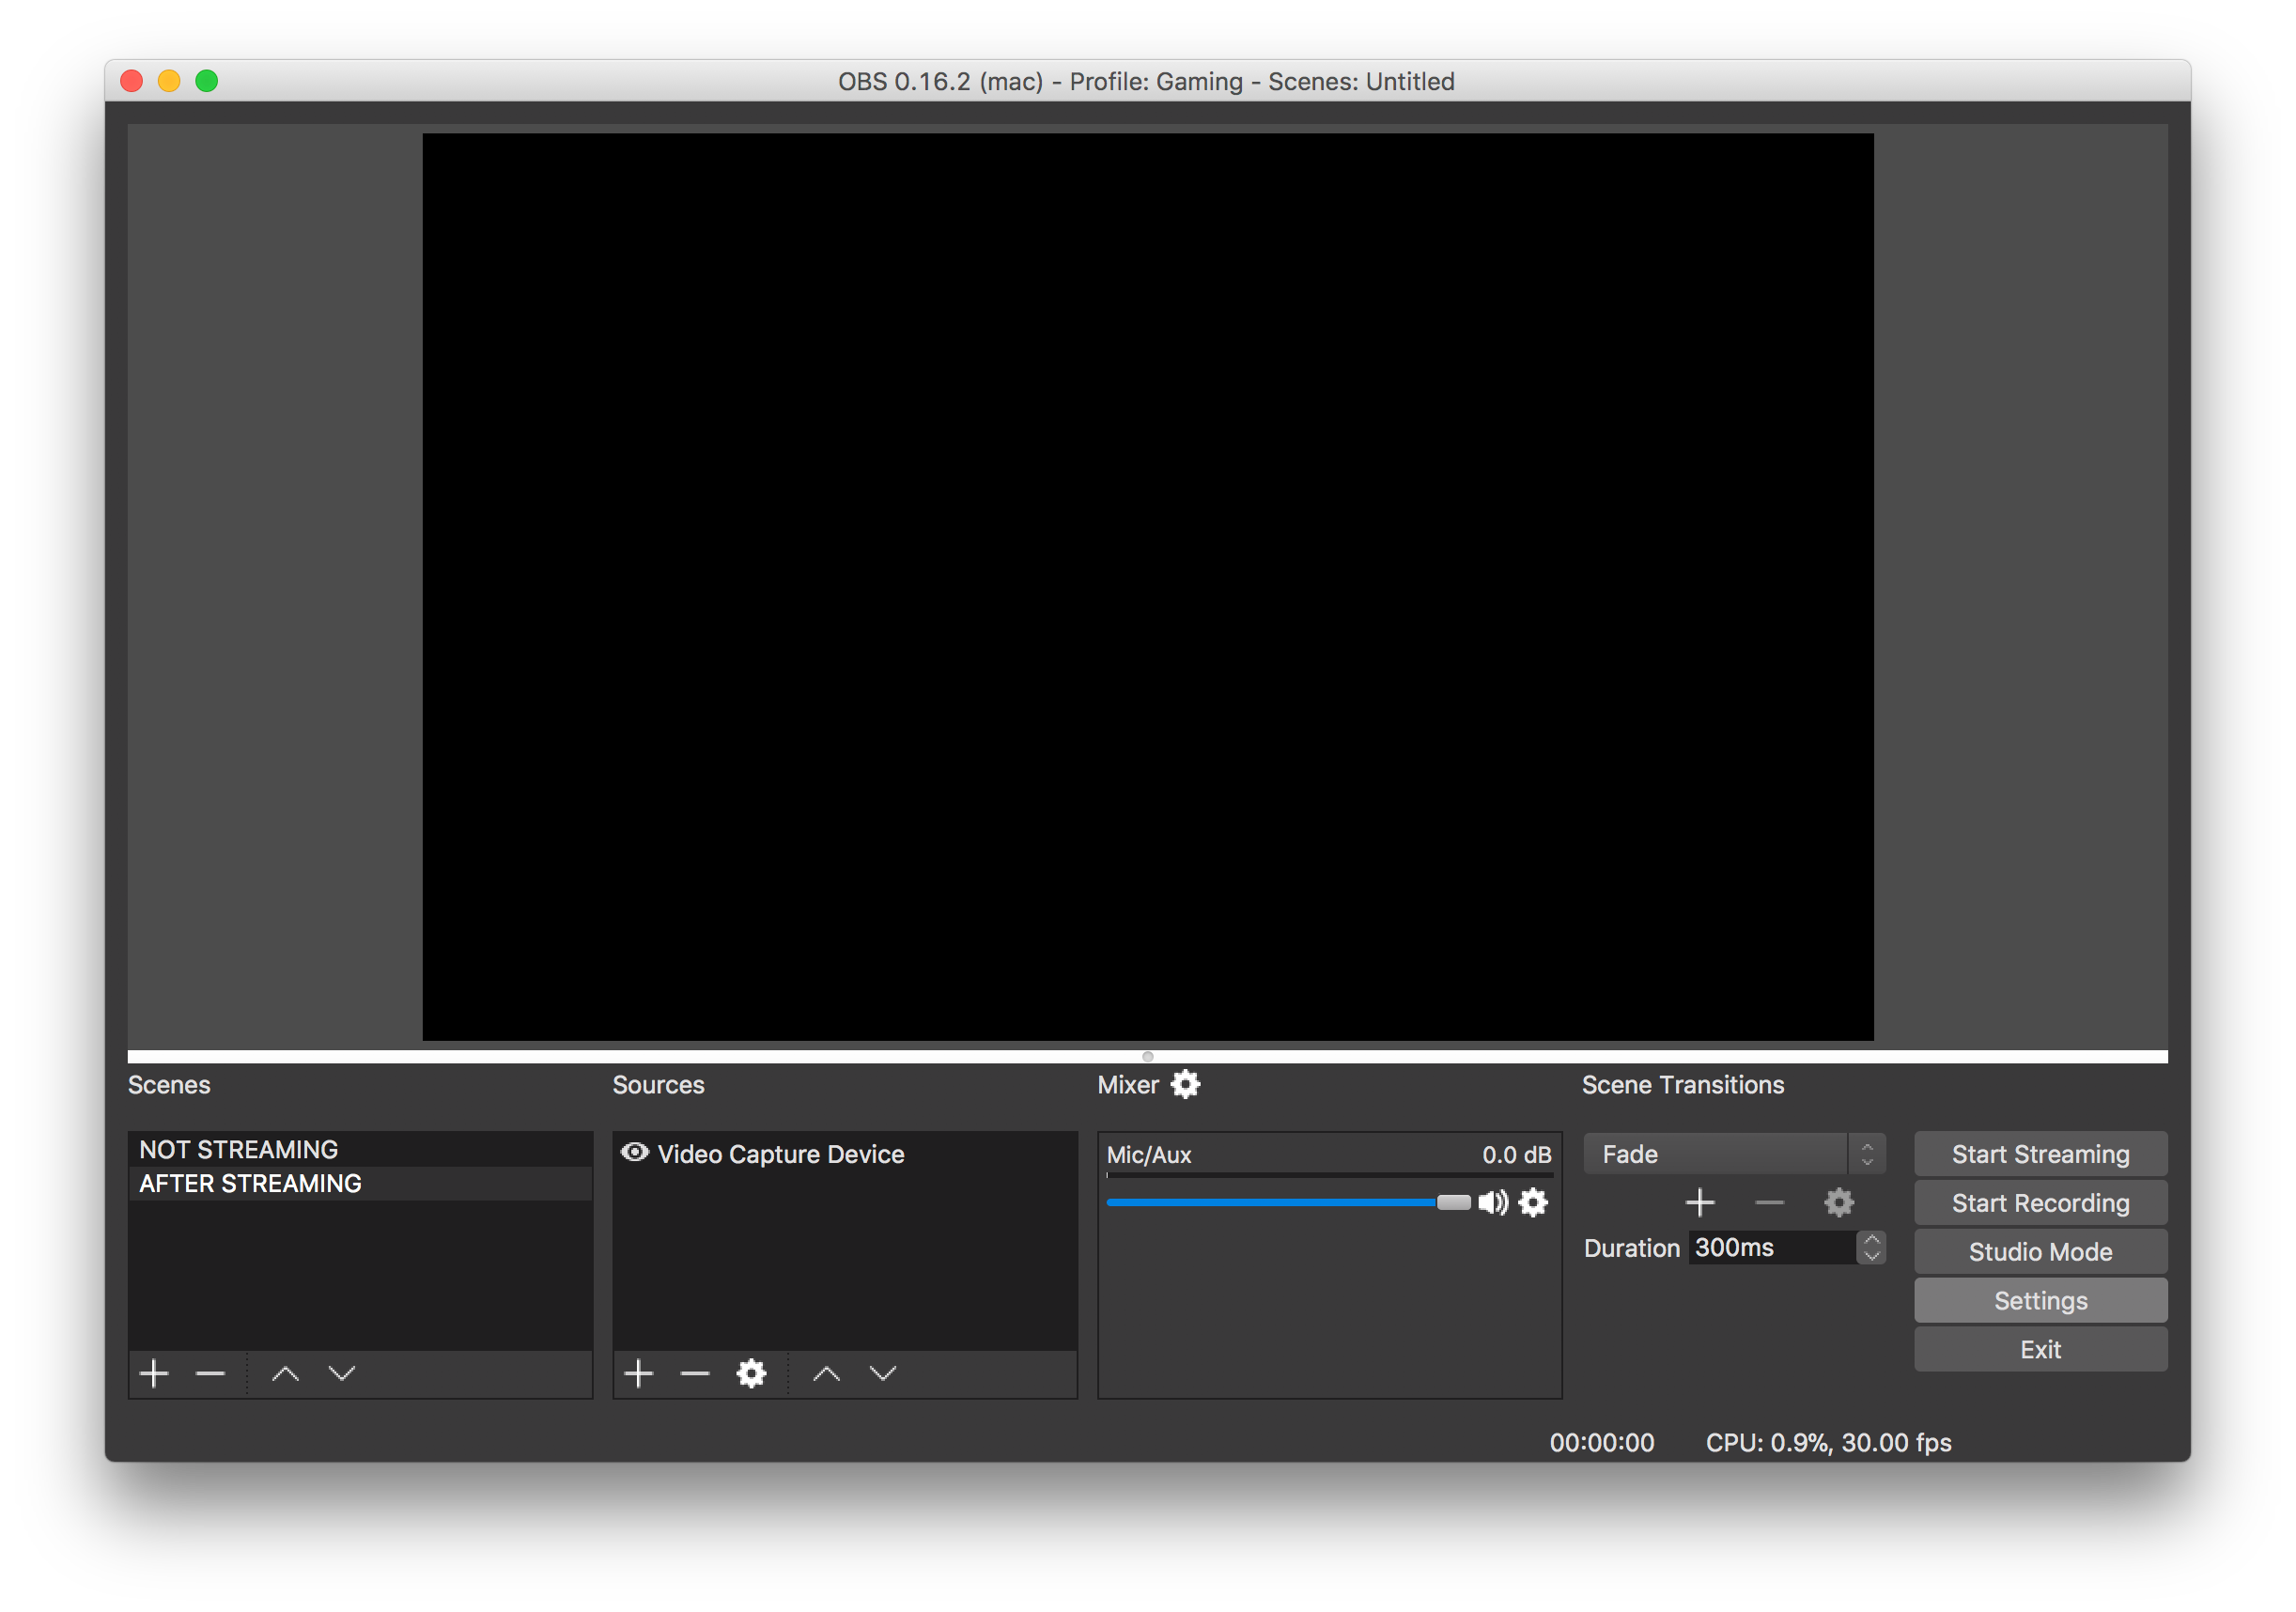
2. Setting Up OBS
Open up Settings in OBS
- Click Settings in the bottom right hand corner
- Click on Stream on the left hand side, then click on Stream Type and set to Custom Streaming Server

- Click Settings in the bottom right hand corner
Copy/Paste Settings from Omnia Account https://app.omnia.church/streams
- Login or Sign up at https://app.omnia.church
- Go to Stream Dashboard here: https://app.omnia.church/streams
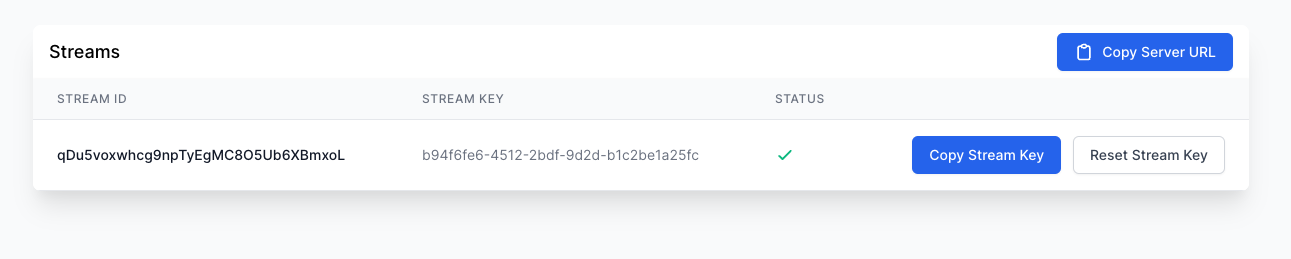
- Copy Server URL from Omnia and paste into URL field in OBS.
- Copy Stream Key from Omnia and paste into Stream Key field in OBS:
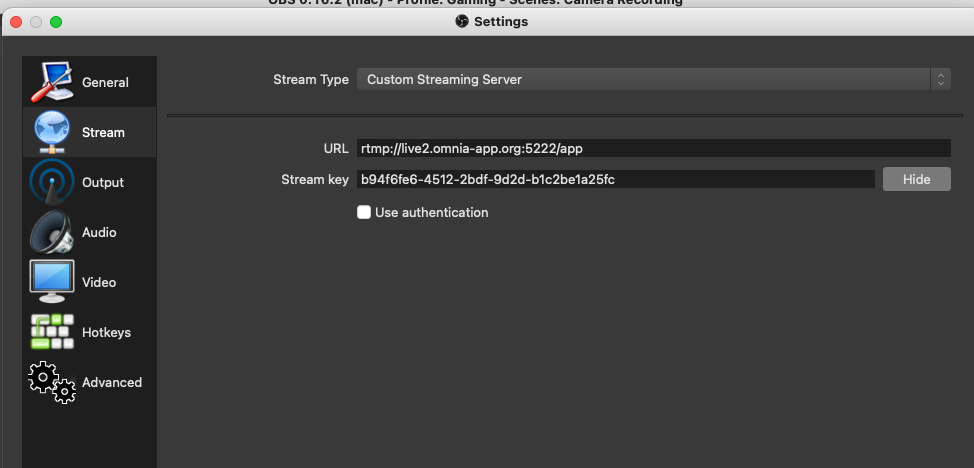
NOTE: Make sure the "Use Authentication" box is NOT checked
3. Start Streaming!
- Click Start Streaming in the bottom right-hand corner.

4. Watch your Channel Live!
- Now go to your Channels page and open your channel to see your stream! (https://app.omnia.church/channels)
- Click the Eye icon to view the Channel
